Browse Tag by Vegan
Dinner, Lunch, Soup, Vegan, Vegetarian

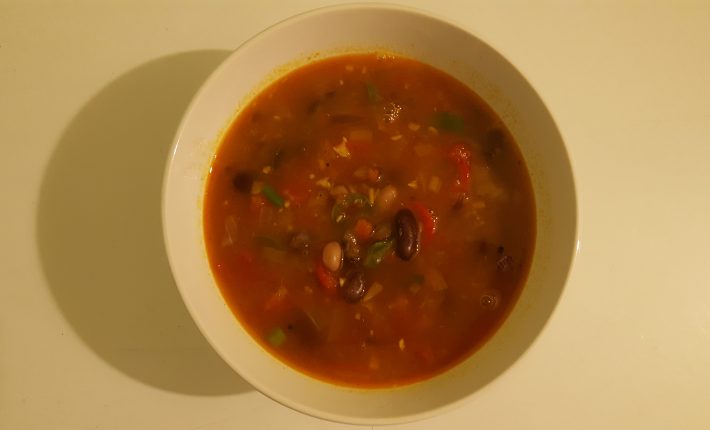
Four Bean Soupreme

Four Bean Soupreme is served!

During the winter months, I enjoy warm, hearty meals with a bit of a kick to fight off those lazy days and over-eager bugs! The Spicy Winter Soup with chicken proved very popular among my family and friends, however, being vegetarian this month meant that I would be getting my protein source from elsewhere! Cue, pulses, in the form of beans, the tinned variety!

Beans are hearty, full of vitamins and minerals, and loaded with protein! Tinned or dried, we have been eating them in various meals for years in our household! If you want to have this as a chilli con carne type meal or increase the protein content, simply reduce the water and add in mincemeat, Quorn or tofu.

I had a busy day and was hungry so had my soup with German rye bread, which is naturally love in gluten and heavy! Two slices do me every time! You can have your soup with whatever you wish! You can even serve it with rice, quinoa or any other carb staple, just remember to not add 1 litre of water, unless you want a sloppy mess!

This recipe is meat free, gluten free, and dairy free, but highly nutritious and delicious, even if I do say so myself!
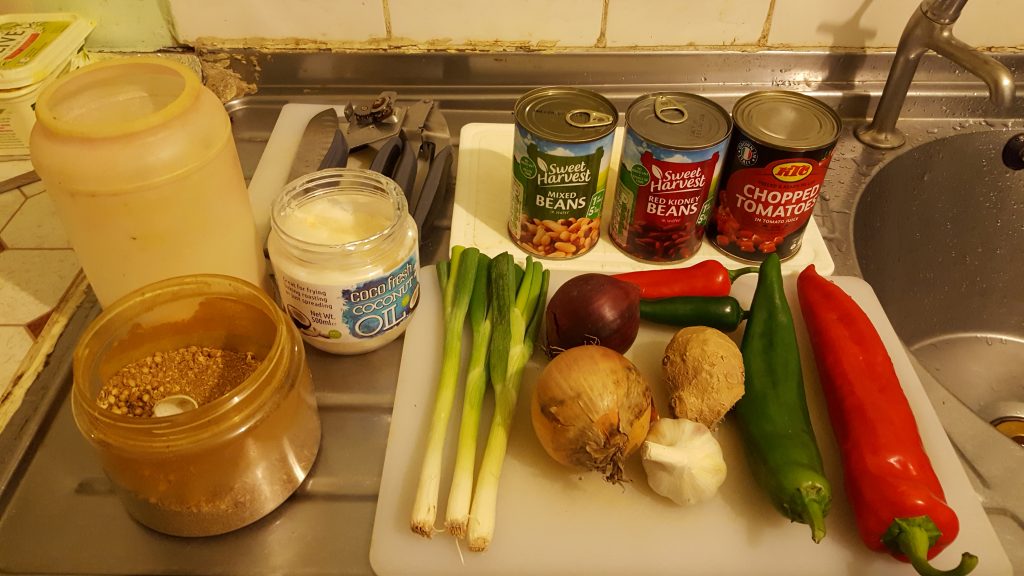
Ingredients - Four Bean Soupreme!
Ingredients – Four Bean Soupreme!

INGREDIENTS

Four Bean Supreme Soup

1 red onion

1 onion

3 spring onions

4 cloves garlic

1 cm ginger

½ red chilli

½ green chilli

½ red pepper

½ green pepper

½ teaspoon dried coriander

1 tin chopped tomatoes

¼ tin red kidney beans

1 tin mixed beans (containing Adzuki, Cannellini and Haricot beans, you can use any mix you like)

Salt and pepper to taste

2 teaspoons coconut oil

1 litre filtered water, boiled

RECIPE

Four Bean Supreme Soup

  1. In a large saucepan, melt 2 teaspoons coconut oil, and add in sliced and diced red, normal and spring onions (keep the green leaves until the end), crushed garlic, chopped ginger and turmeric, and sauté until golden brown, cooking on 3/4 heat;
  2. Add in 1 tin chopped tomatoes, dried coriander, ½ teaspoon salt, and cook until the water evaporates for an infused and blended taste. I added in the chillies at this step because I wanted a spicier soup;
  3. Add in the chopped peppers and beans, mix gently and add in the boiling water;
  4. Cover and leave to cook for around 10 minutes on ¼ heat, stirring occasionally and to check the ingredients are done as you like them;
  5. Your Four Bean Soupreme is served! (If you wish, garnish with fresh coriander, parsley, basil or even mint!).
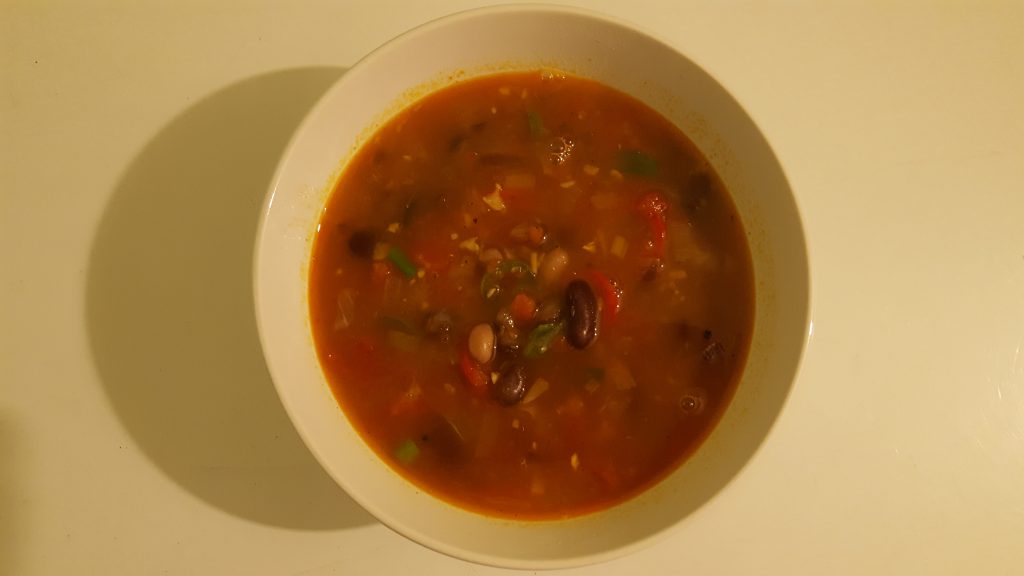
Four Bean Soupreme is served!

Preparation time: 15 minutes

Cooking time: 20 minutes

Eating time: 15 minutes

Serves 2-4 people

Let me know how you get on and please feel free to provide feedback 🙂

Dinner, Lunch, Vegan, Vegetarian

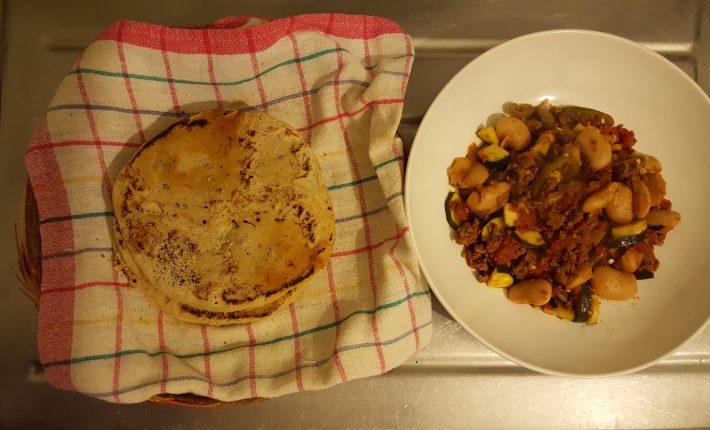
Chilli Con Quorni

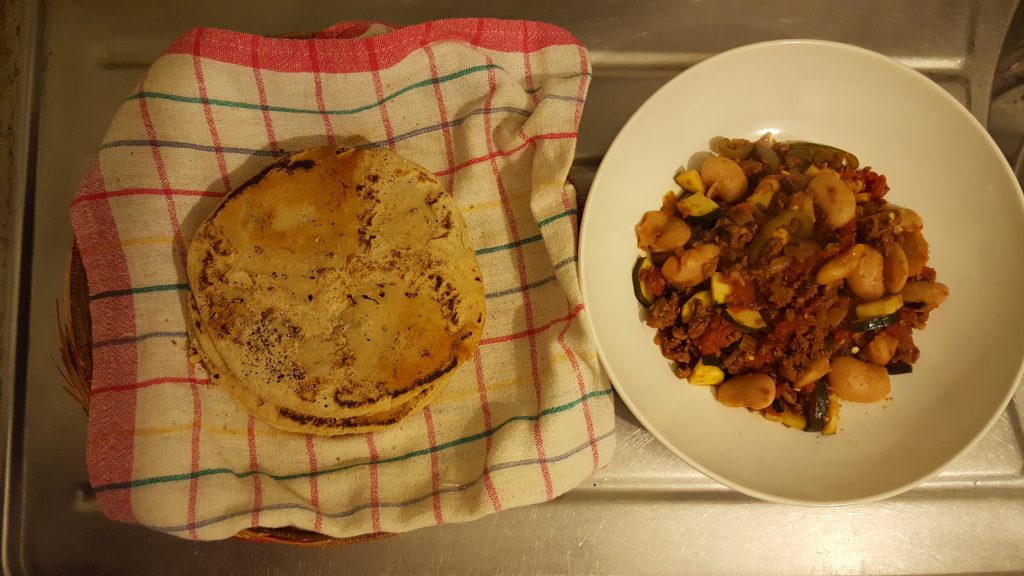
Chilli Con Quorni and Juwar Chapatti!

It’s my first full month of going vegetarian and we’re cooking on gas, both literally and metaphorically! I wanted to cook chilli con carne but didn’t have all the ingredients that I would have liked but, so I improvised! I love spicy food but not too spicy, and the whole point of my blog is to make spicy tasty food highly nutritious, so I upped the vegetables and added protein in the form of Quorn mince!

Chilli con carne is usually served with white rice, but I really didn’t fancy more (brown!) rice this week, especially after having so much quinoa! Therefore, I decided to get the boss, my mum, in to help out! I wanted some form of bread but being gluten intolerant means her delicious chapattis (made from chapatti flour) don’t go down very well, literally, so mum suggested that I have my meal with juwar chapatti instead!

Juwar, or sorghum flour, is naturally gluten free, high in protein and carbs, light but moreish, and very easy to make, so easy that I got my mother in to make it… also, because I have the hands of a baby and can’t handle the heat from the hot chapatti pan… ehem…! But mum does it better anyway, as you might have seen from the video, so I got the seasoned experts in!

This recipe is meat free, gluten free, and dairy free, but highly nutritious and delicious, if I do say so myself!

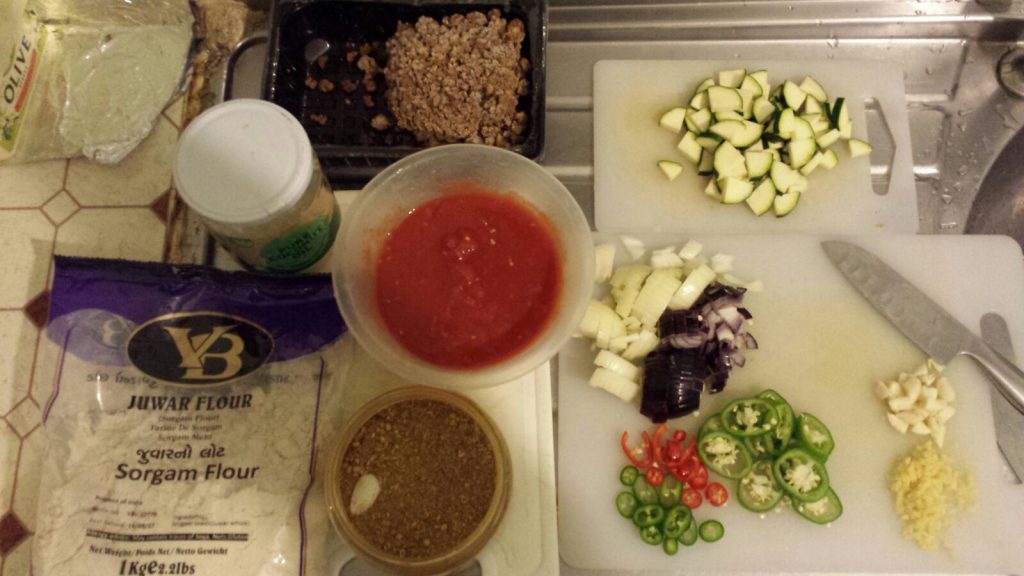
Chilli Con Quorni Ingredients

INGREDIENTS

Chilli Con Quorni

200 g Quorn mince

1 red onion

1 onion

3 spring onions (I would have added them if I had them!)

3 cloves garlic

1 cm ginger

1 cm turmeric (I would have added it if I had it!)

½ courgette/zucchini

½ red chilli

½ green chilli

½ red pepper (I would have added it if I had it!)

½ green pepper

½ teaspoon dried coriander

1 tin chopped tomatoes

½ tin white kidney beans (I would have added half a tin if I had other kidney beans in!)

½ tin red kidney beans (I would have added it if I had it!)

½ tin black kidney beans (I would have added it if I had it!)

Salt and pepper to taste

2 teaspoons coconut oil

Juwar Roti

250 g sorghum flour

500 mL filtered water (boiled)

RECIPE

Chilli Con Quorni

  1. In a large saucepan, melt 2 teaspoons coconut oil, and add in sliced and diced red, normal and spring onions (keep the green leaves until the end), crushed garlic, chopped ginger and turmeric, and sauté until golden brown, cooking on 3/4 heat;
  2. Add in quorn and mix until all the bits are separated;
  3. Add in 1 tin chopped tomatoes, dried coriander, ½ teaspoon salt, and cook until the water evaporates;
  4. Add in the chopped chillies, peppers, kidney beans (drained) and courgette, cover and leave to cook for around 10 minutes on ¼ heat (start making the juwar chapatti), stirring occasionally and to check the ingredients are done as you like them;
  5. Chilli con Quorni is served! (If you wish, garnish with fresh coriander, parsley, basil or even mint!).

Juwar Chapatti

  1. In a bowl, add 250 g sorghum flour, and add enough boiling filtered water needed to knead the dough into dough balls;
  2. 250 g of sorghum flour will give you around 5 dough balls, more than enough for 2 people;
  3. On a plastic sheet, gently flatten out the dough balls with your hands into a circle (~15 cm diameter);
  4. Cook on a hot pan, the one you saw mum use is specific for chapattis;
  5. To ensure the dough is cooked thoroughly and in the interests of speed, you can use a solar grill to finish off the juwar chapattis.
Chilli Con Quorni and Juwar Chapatti!

Preparation time: 15 minutes

Cooking time: 20 minutes

Eating time: 15 minutes

Serves 2 people

Let me know how you get on and please feel free to provide feedback 🙂
Dinner, Lunch, Vegan, Vegetarian

Gluten-Free Quorn Bolognese

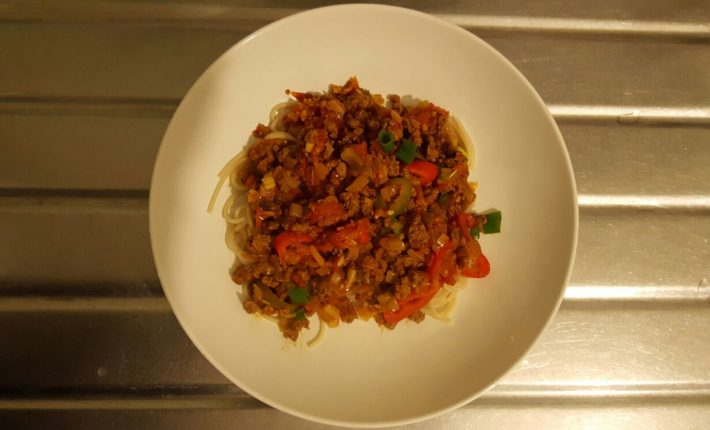
Gluten-Free Quorn Bolognese is served!

I have been making Spaghetti Bolognese for many years now, throughout university and my time abroad, trying to make it healthier, tastier etc., draining the fat from the minced beef, trying different oils and wholegrain spaghetti.

With going meat-free, spag bol was off the menu, until a trip to the supermarket turned it on its head! Now, I know meat alternatives exist, I never got around to buying “fake meat” because I used to enjoy the real thing! Now, needs must! So, I bought some packs of quorn and have been experimenting with “chicken” and “mince beef”, to varying degrees of success (mum hated quron tikka masala, but don’t worry, it’s coming!). Considering I hadn’t had spag bol since some time last year and don’t eat pasta, Spaghetti Bolognese was on! I have had gluten-free spaghetti at home for a while because of one of my friends who has Coeliac disease, so she can eat something whenever she’s over!

I love the mix of all 3 different types of onions available at the supermarkets here in the UK (I used to have white onions in Germany!) when caramelised together, I get this delicious sweet and tangy taste and aroma! Topped with some fresh garlic, ginger and turmeric, we’re rocking!

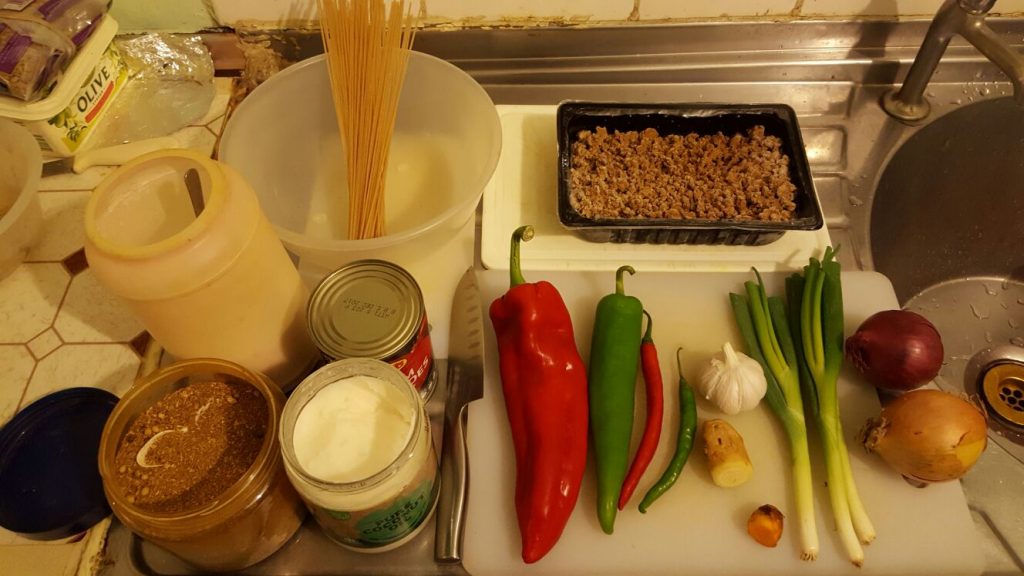
Gluten-Free Quorn Bolognese Ingredients

INGREDIENTS

Quorn Bolognese

250 g Quorn mince

1 red onion

1 onion

3 spring onions

3 cloves garlic

1 cm ginger

1 cm turmeric

½ red chilli

½ green chilli

½ red pepper

½ green pepper

½ teaspoon dried coriander

1 tin of chopped tomatoes

Salt and pepper to taste

2 teaspoons coconut oil

Gluten-Free Spaghetti

50 g gluten-free spaghetti (mine is made from brown rice)

1 teaspoon coconut oil

½ teaspoon salt

500 mL filtered water

RECIPE

Quorn Bolognese

  1. In a large saucepan, melt 2 teaspoons coconut oil, and add in sliced and diced red, normal and spring onions (keep the green leaves until the end), crushed garlic, chopped ginger and turmeric, and sauté until golden brown, cooking on 3/4 heat;
  2. Add in 1 tin chopped tomatoes, dried coriander, ½ teaspoon salt, and cook until the water evaporates;
  3. Add in the chopped chillies, peppers and quorn, cover and leave to cook for around 10 minutes on ¼ heat (start cooking the spaghetti);
  4. Stir occasionally and check the ingredients are done as you like them;
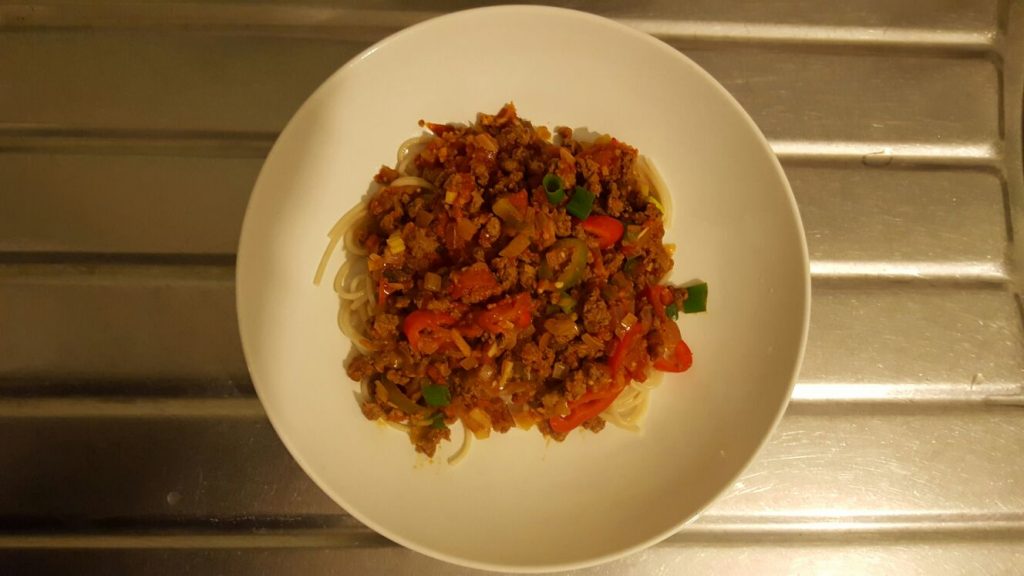
  5. Quorn Bolognese is served! (If you wish, garnish with fresh coriander, parsley, basil or even mint!).

Gluten

  1. In a saucepan on ¾ heat, add 1 teaspoon of coconut oil and ½ teaspoon of salt (put the 500 mL of filtered water on to boil);
  2. Add in the boiling water, stir, add the spaghetti and stir gently for 30 seconds, cover and leave to cook for 10 minutes on ¼ heat;
  3. Check on it 5 minutes later and gently stir;
  4. Cook until it is to your liking and drain the spaghetti;
  5. Cooking time is about 10 minutes and it is ready to eat!
Gluten-Free Quorn Bolognese is served!

Preparation time: 10 minutes

Cooking time: 20 minutes

Eating time: 15 minutes

Serves 2 people – mum was surprised by the taste and had hers with horrible white spaghetti!

Let me know how you get on and please feel free to provide feedback 🙂
Dinner, Lunch, Vegan, Vegetarian

Spicy Spinach

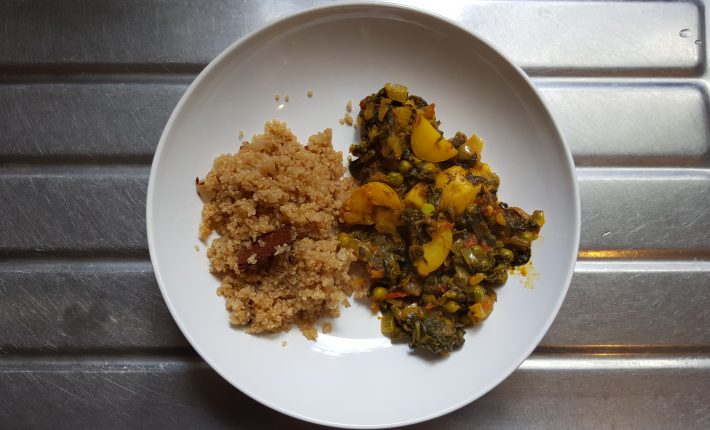
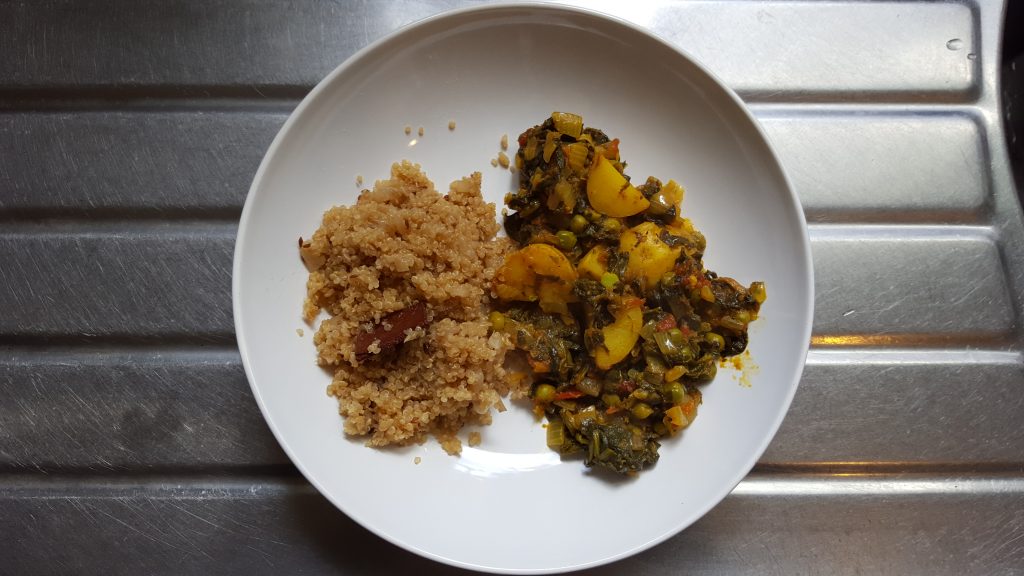
As part of my little experiment to go meat free, I decided to get mum in to help me out when I decided to cook! She suggested I cook her dish Spicy Spinach, which I have enjoyed for many years. The only thing we have changed recently is using coconut oil instead of other oils.

Traditionally, we ate this with every other Saturday with yellow rice, (mum uses turmeric for the colour!), and kurhi, a heated watered down yogurt, not great for my digestive system! Mum also enjoys this with chapati, naan or pitta bread, however, with my gluten intolerances, I guess I could handle wholemeal or jasmine rice, but I went with my tried and trust quinoa, made Indian style!

This dish is perfect for a light lunch or dinner, contains potatoes for some carbs (mum said sweet potato or butternut squash would make the dish too sweet, so I went with starchy potatoes!), iron and zinc from spinach and other spices to up antioxidants. You will also receive a decent amount of protein from 40 g of quinoa!

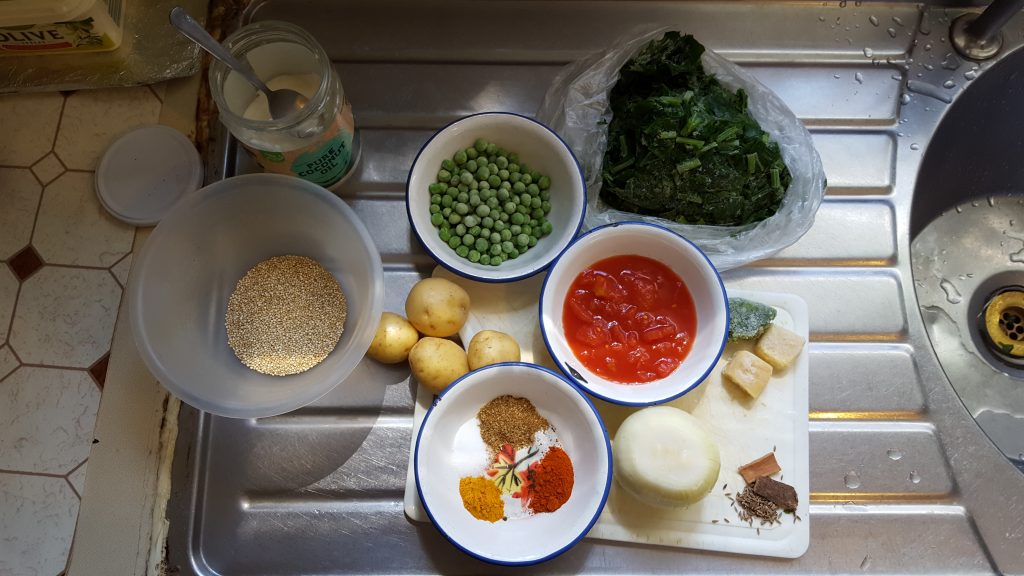
Spicy Spinach and Quinoa Ingredients

INGREDIENTS

Spicy Spinach

200 g spinach (we used a bag we’d frozen before)

50 g peas (we used a bag we’d frozen before)

¼ tin chopped tomatoes

4 charlotte potatoes

4 cloves garlic (we used a bag we’d frozen before)

2 cm ginger (we used a bag we’d frozen before)

2 green chillies (we used a bag we’d frozen before)

1 teaspoon salt

1 teaspoon turmeric

1 teaspoon dried coriander

1 teaspoon red chilli powder

1 teaspoon

2 teaspoon coconut oil

Pillau Quinoa

40 g quinoa

¼ onion

2 cinnamon sticks

200 mL of filtered water, boiled.

¼ teaspoon Salt

1 teaspoon Coconut oil

INSTRUCTIONS

Spicy Spinach

  1. In a large saucepan, add in ¾ chopped onion, 2 teaspoon coconut oil peas, garlic, ginger, chilli, ¼ tin tomatoes, chopped potatoes, spices and seasoning, place on ½ heat and cover for 5 minutes whether ingredient are frozen or not due to moisture from the spinach;
  2. Simmer on ¼ heat for 20 minutes and stir occasionally to mix;
  3. Spicy Spinach is served! Yes really!

Pillau Quinoa

  1. You can begin cooking this simultaneously with the Spicy Spinach;
  2. In a saucepan on ¾ heat, add 1 tablespoon of coconut oil (put the water on to boil);
  3. Slice and dice in the ¼ onion and stir, sauté until the onion caramelises;
  4. Add in the cinnamon sticks;
  5. Add in the boiling water and a ¼ teaspoon of salt;
  6. Add the quinoa and stir gently;
  7. Allow the quinoa to simmer, turn the heat down to a quarter, and cover with the lid;
  8. Check on it 3 to 5 minutes later and gently turn the quinoa over with a plastic or wooden spoon to ensure you keep your quinoa seeds in tact;
  9. Repeat step 8 until the quinoa is cooked and all the water evaporates;
  10. You are now ready to eat!
Spicy Spinach and Quinoa

Preparation time: 10 minutes

Cooking time: 20 minutes

Eating time: 15 minutes

Serves up to 2 people

I made enough just for mum and I!

Let me know how you get on and please feel free to provide feedback 🙂
About Me

Going Meat Free in 3 Months!

Hi everyone, sorry for being away for so long and not posting anything, I upgraded my hosting and they lost everything… but then I managed to rescue my blog, so here I am!

First up, I have some news for you, which will affect what I post on here over the next 3+ months! As you will have seen from the title, I am going meat free in 3 months! I have gone red meat free for October (Stoptober!), will go chicken free in November, and fish free in December, i.e. full vegetarian! I am not sure about vegan, I love my eggs too much but let’s see how I get on!

Considering that I am lactose (and to an extent gluten) intolerant, I want to see how going without animal products affects my body and mood. This is as much an experiment for me as it is to share my life with my vegetarian and vegan friends! I currently only drink lactose-free milk and have gone dairy free before but never totally animal product free! If I feel good on a vegetarian diet and find good alternatives to egg then I will most certainly go vegan for a month!

Stay tuned for some funky recipes, as usual, a mix of mums cooking blended with healthier alternatives from modern cuisine, spiced up by me!! I am pretty excited about sharing my journey with you!

Dinner, Lunch

Mighty Mung

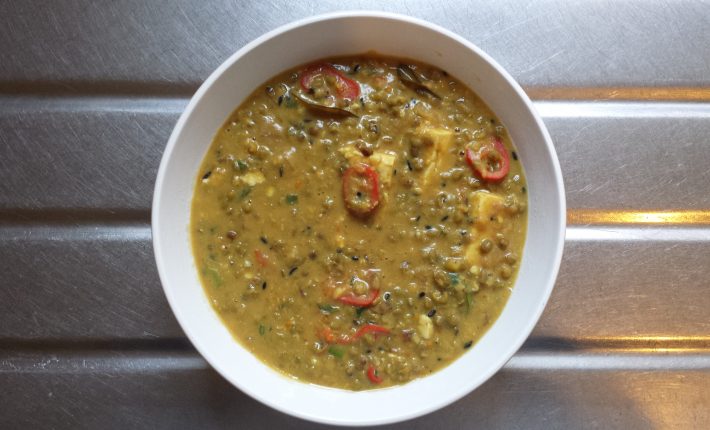
Mighty Mung

Mung, or moong, is a green bean that’s popular over the Asian subcontinent, and very popular in our household! Mung is a good mix of proteins, carbs and fibre and is a staple food in India, where my family come from. It is popular among those who are vegetarian and vegan, so if you want a nutritional punch without the meat and dairy, this is the dish for you!

Growing up here in England, we had mung at least once a week! Traditionally, we had it with my mum’s delicious chappati, and my dad and I used to lap it up, by breaking the chappati up into little pieces and mixing it in the mung and digging in! My mum would also add yoghurt to the mung for thickness and taste, so I have continued with that but changed from dairy to soya yoghurt because of my lactose intolerance, acid reflux and IBS – believe me, the payback is definitely not worth it, not even a little bit… Think the film Bridesmaids…!

Nowadays, I am off the refined carbs due to my digestive issues with carbs and also my health and fitness reasons – there is a reason this is fitness food blog – which is my quest for a 6-pack! I am not that far off currently but I am going to motor on with this no refined carb and no dairy diet, it’s working for me both in terms of my health and fitness 🙂

One of the things I am trying to do is increase the nutritional value of all of our traditional dishes whilst removing the refined carbs. In this case I decided to add coloured vegetables in the form of chilli and peppers to increase the complex carbs and upped the protein by adding some tofu! The result is a delicious mix that has surprised me over and over again by how tasty it turned out, and it impressed my dear mother too! With my modifications, you get your protein, carbs and fibre, spice and taste all in one dish, what more could you ask for? 🙂

Prepped and ready to cook!

INGREDIENTS

1/2 onion

1/2 red onion

2 spring onions

3 cloves of garlic (I love garlic in my food)

1 cm of ginger

1 cm haldi (not tamarind as I say in the video, my apologies!)

1 red chilli

1 green chilli

1/2 long red pepper

1 long green pepper

1 fresh tomato

1 teaspoon cumin seeds

200g tofu

Olive oil

Salt

Pepper

1 tablespoon dried coriander

100ml soya yoghurt

1 litre of filtered and boiled water

First full fresh coriander

2 saucepans, 1 medium, 1 small

INSTRUCTIONS

  1. In the large saucepan, add 500mL filtered boiling water and add in the 100 g mung. Stir, cover with lid and allow to boil on ¾ heat for at least 30 minutes, or until all the mung have split;
  2. Continue to check on the large saucepan every 10 minutes or so for water and stir (add more water if you need, and trust me, you will need to! With the rest of the boiled water in the kettle, prepare a cup of tea!);
  3. In the small saucepan slice and dice in the onions (hold back the green leaves of the spring onions until the end), add 1 teaspoon of cumin seeds and allow the onions to turn brown whilst stirring;
  4. Once the onions brown, add the garlic (I cut the garlic knobs up, press them in a garlic crusher and add them directly into the saucepan), chopped ginger, haldi and tomatoes, curry leaves and dried coriander;
  5. Continue to stir gently until the tomato cooks through;
  6. Check on the mung (should be done around the 30-minute mark), and if the mung beans have popped, add in the contents of the small saucepan, chop in the red and green chillies (add them later at point 8 if you want your mung less spicy) add ½ teaspoon of salt and stir;
  7. Turn the heat down to a quarter, taste the mung and add salt and black pepper to taste;
  8. Chop in the red and green peppers, stir and cover with the lid and to cook for about 5 minutes;
  9. Add the chopped tofu and spring onion leaves and cover for 5 minutes;
  10. Feel free to add any coriander to finish and you are ready to eat!
Mung is served!
Mung is served!

Preparation time: 15 minutes

Cooking time: 45 minutes

Eating time: 15 minutes

Serves up to 4 people

I made enough for the next day as we had a busy weekend ahead!

Let me know how you get on and please feel free to provide feedback J