Browse Tag by Indian
Breakfast, Dinner, Lunch, Snack, Vegetarian

Fishy Omelette

Fishy Omelette :)

I love eggs! Free-range mind. And I eat 4 every morning for breakfast! I get my daily dose of post-gym protein and healthy fats without fail! Hard boiled, scrambled or as an omelette, I eat eggs! The omelette is ubiquitous throughout the world and comes in many different forms such as the frittata (Italian omelette) in Italy, tortilla in Spain (Spanish omelette) or the tamagoyaki in Japan (Japanese omelette).

In Gujarat, India, the birthplace of my parents, the omelette is called a pura. As you can expect, Indian omelettes are spiced up to the high heavens! If there’s no chilli, it isn’t Indian! I loved the omelettes my mum and dad made for me and sometimes mum does still make them. In our household, and I am sure many households, it is the default go-to dish when you are hungry, don’t want to make a fuss in the kitchen and enjoy a filling meal.

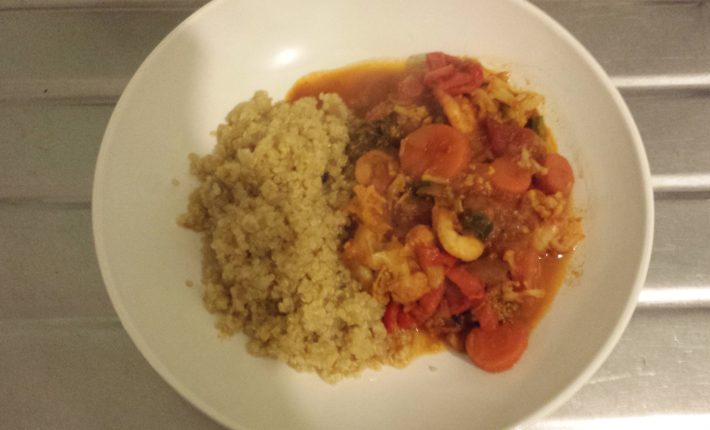
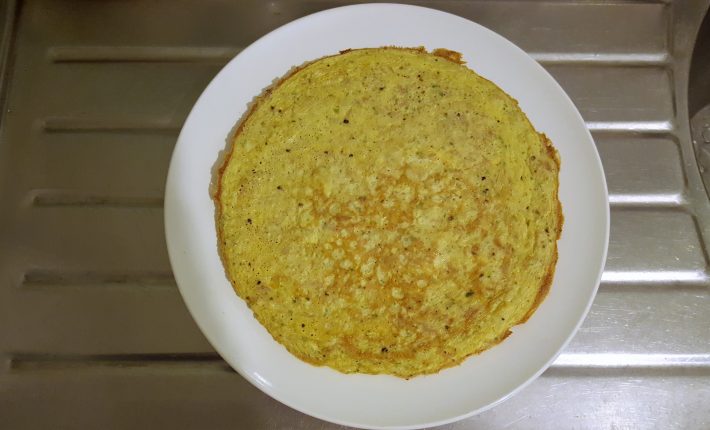
Now, I do love my mum’s omelettes, but they tend to leave me feeling a little hungry – must be my big appetite! So, about 3 months ago, after a big morning workout, when I felt hungry enough to eat a cow, I decided to experiment (much to the chagrin of my mother’s traditionalist attitude in the kitchen) with a tin of tuna, and half a tin of mixed vegetables, along with the regular spice, and coconut oil! Up until this point, mum was using olive oil (and vegetable or sunflower oils before that, which play havoc with my immune system) for her omelettes, even though we’d switched to coconut oil – something about frying and “proper” oil ;). Anyway, I ended up cooking a deliciously healthy, tasty, quick and easy meal, rich in protein, good fats and healthy carbs, which was rustled up in 15 mins, and eaten in about 5! You can have this omelette for breakfast, lunch and dinner, and if you reduce the ingredients, a hearty snack! Oh, and if you want to up your greens, this omelette goes perfectly with salad!

I cooked this without the half tin of mixed vegetables because it was late and I wasn’t as hungry as I am after the gym! However, don’t be scared to experiment, have a bit of fun in the kitchen and see what you can come up with!
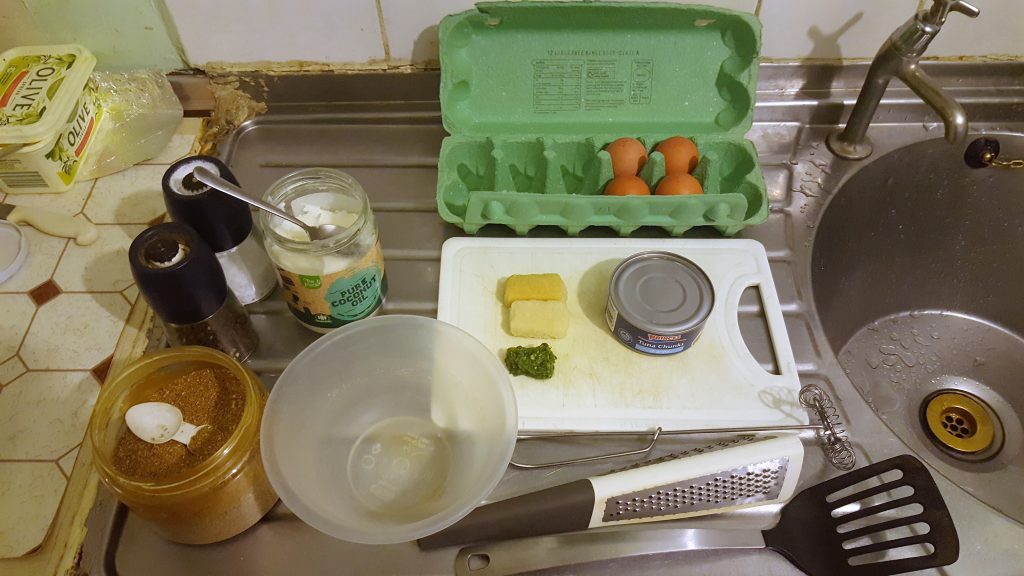
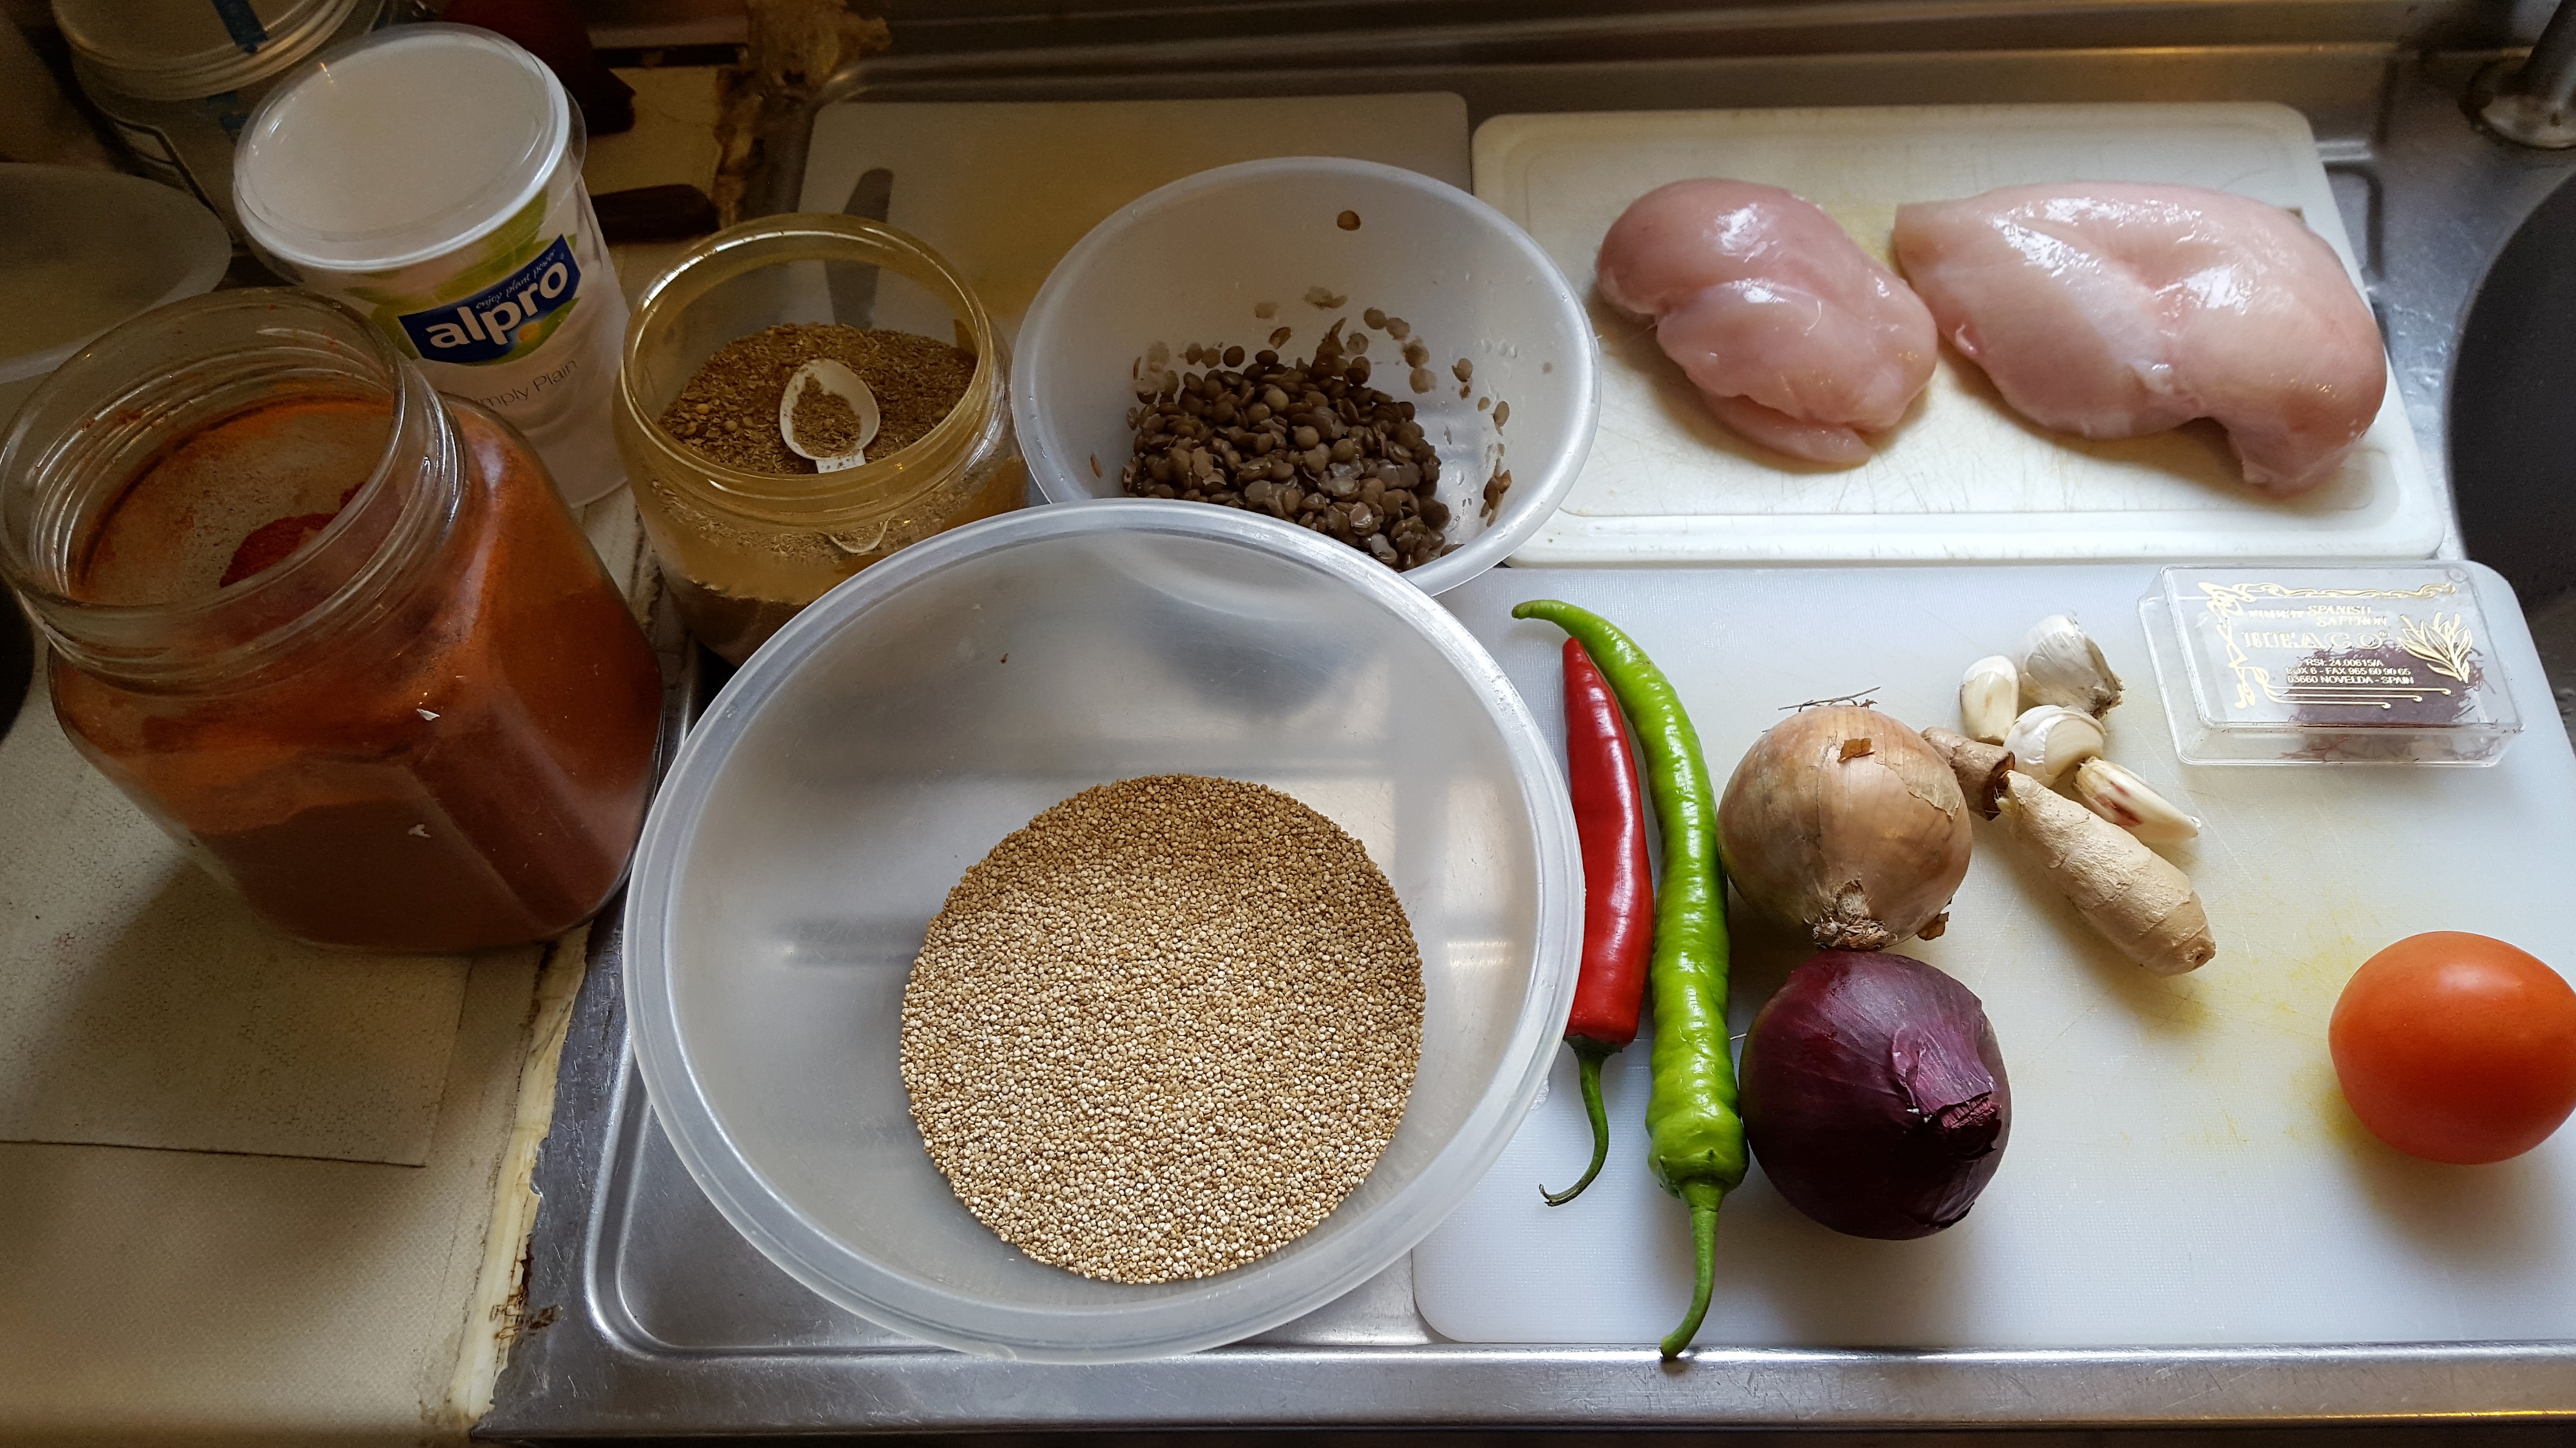
Fishy Omelette Ingredients

INGREDIENTS

4 free range eggs

4 cloves garlic (I used a bag we’d frozen before)

2 cm ginger (I used a bag we’d frozen before)

2 green chillies (I used a bag we’d frozen before)

Salt and pepper to taste

Optional: Red chilli powder


Optional: ½ can of mixed vegetables

1 can of tuna (remove the brine)

½ teaspoon dried corriander

1 teaspoon coconut oil

RECIPE

  1. In a bowl, whisk up the eggs, garlic, ginger, chilli, salt, pepper, seasoning and tuna (and mixed vegetables);
  2. Heat up a teaspoon of coconut oil in a large non-stick frying pan;
  3. Pour the mix into the frying pan and cook on a medium heat for about 5 minutes, the bottom is cooked;
  4. Turn on the solar grill to full and place the frying pan in there for about 5 minutes whilst the top of the omelette cooks. If you don’t have a solar grill and/or want to flip the omelette, good luck!
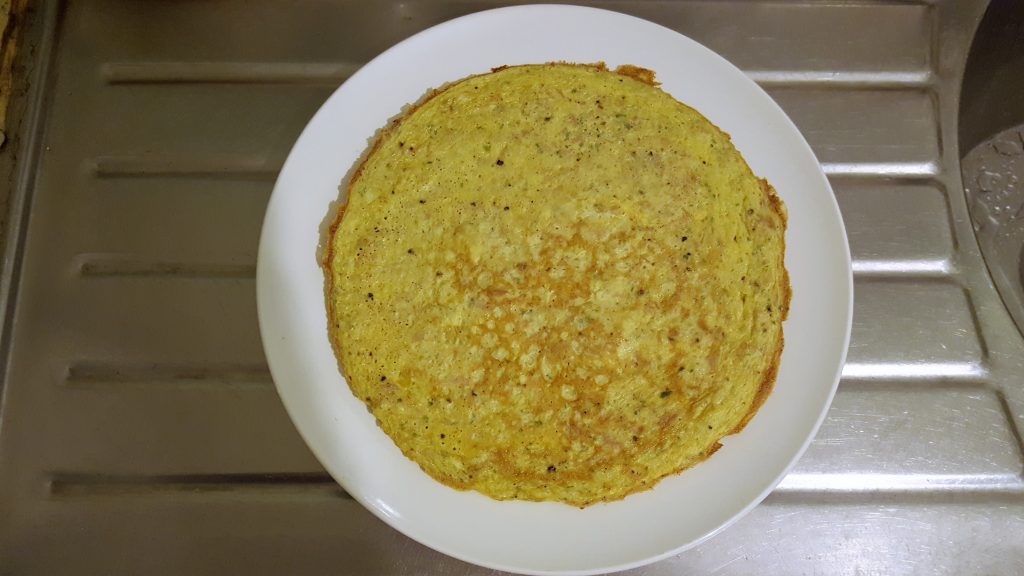
  5. Once it cooks to your taste, place a large plate over the frying pan, carefully flip over, and you are ready to eat!
Fishy Omelette :)
Fishy Omelette 🙂

Preparation time: 5 minutes

Cooking time: 10 minutes

Eating time: 15 minutes

Serves up to 2 people

This was a meal for me, but it could easily feed 2! My rule of thumb is 2 eggs per person 🙂

Let me know how you get on and please feel free to provide feedback 🙂

Dinner, Lunch

ChiQuin Biryani

Biryani, be with any type of meat and/or vegetables is very popular during special occasions across the India subcontinent, and of course amongst immigrant Indian families across the world.

Traditionally, we have always enjoyed chicken biryani at home, such as the Eid (feast) after the Muslim holy month of Ramadan (Eid-ul-Fitr or Feast of Fast breaking) or 60 days later for Eid-ul-Adha (Feast of Sacrifice). Mum’s also made it for birthdays, family gatherings and so forth, and I have enjoyed it at weddings, engagements and other events.

As much as I love this speciality dish, I wanted to modernise it for my health and fitness needs. Therefore, I used only fresh ingredients (mum likes using frozen garlic and ginger), swapped the olive oil for coconut oil and used quinoa instead of rice! (I know what you’re thinking, I should rename this blog Spiced Up With Quinoa!).

You will need 3 saucepans for this, 2 medium sized ones and one large one, which you can line with aluminium foil like we do at home for easy washing.

INGREDIENTS

Chicken Mix

2 chicken breasts

100g lentils

100g soya yoghurt (you can add any type of yogurt; I am lactose intolerant!)

1 onion

1 red onion

1 tomato

4 cloves of garlic

1 cm of ginger

1 cm haldi (turmeric)

1 long red pepper (didn’t have this available at the time!)

1 long green pepper

1 long red chilli

1 long green chilli (didn’t have this available at the time!)

1 spoon dried coriander

1 teaspoon red chilli powder

1 pinch of saffron

Coconut oil

1 teaspoon salt

1 litre of filtered and boiled water

1 tin of chopped tomatoes (you can use fresh if you wish but it’s quicker and easier to use a can!)


Quinoa

200 g quinoa

Coconut oil

400 mL of filtered water, boiled

Salt

ChiQuin Ingredients
ChiQuin Ingredients

INSTRUCTIONS

Chicken (saucepan 1)

  1. In a saucepan on ¾ heat, melt 2 tablespoons of coconut oil (put the water on to boil);
  2. Slice and dice in the onions, and stir regularly until the mix starts to bronze;
  3. Add the garlic (I cut the garlic knobs up, press them in a garlic crusher and add them directly into the saucepan) and ginger to the saucepan and stir;
  4. To the mix, add one freshly chopped tomato, 100g soya yogurt, dried coriander, turmeric and a half a teaspoon of salt (feel free to add gharam masala);
  5. Chop in the chillies and peppers (if you want your dish less spicy, add the chillies in with the other vegetables in point 7);
  6. Cook this mix while stirring gently until the water evaporates (points 1-6 should take 5 minutes cooking time);
  7. Begin preparing the quinoa;
  8. Cut the chicken breasts into cubes, add to the saucepan and cook until all raw bits disappear, stir gently;
  9. Turn the heat down to a quarter, add salt to taste, cover with the lid and leave the mix to cook for about 10 minutes;
  10. You are now ready to mix with the quinoa!

Preparation time: 15 minutes

Cooking time: 15 minutes


Quinoa (saucepan 2)

  1. In a saucepan on ¾ heat, melt 1 tablespoon of coconut oil (boil 500 mL filtered water);
  2. Add in the quinoa and mix with the coconut oil (helps to keep the quinoa grains separated);
  3. Add in 200mL boiling water and a ½ teaspoon of salt;
  4. Allow the quinoa to simmer, turn the heat down to a quarter, and cover with the lid;
  5. Check on it 3 to 5 minutes later and gently turn the quinoa over with a plastic or wooden spoon to ensure you keep your quinoa seeds in tact;
  6. Allow the quinoa to simmer until the quinoa is cooked (add more water if needed) and all the water has evaporated;
  7. You are now ready to mix with the chicken!

Preparation time: 1 minute

Cooking time: 15 minutes


ChiQuin Biryani (saucepan 3)

  1. Spread 1/3 quinoa at the bottom;
  2. Spread 1/2 lentils over the quinoa;
  3. Spread 1/2 of the chicken mix over the lentils;
  4. Spread remaining 1/2 lentils over the chicken;
  5. Spread remaining 1/2 chicken mix over the lentils;
  6. Spread remaining 2/3 quinoa over the chicken;
  7. Cook on half heat for 15 minutes, and check the chicken with a knife to see if it has almost cooked through;
  8. Transfer onto an elevated gauze or saucepan (to stop the bottom quinoa layer from burning) for 15 minutes on 1/4 heat;
  9. Check to see if chicken has cooked and the mix is to your liking;
  10. You are now ready to eat!

Preparation time: 2 minutes

Cooking time: 30 minutes

Serves up to 2-4 people –I made enough biryani to last us another day!

Let me know how you get on and please feel free to provide feedback!


Chiquin Biryani
ChiQuin Biryani
Dinner, Lunch

Spicy Green Prawns

Spicy Green Prawn Curry With Quinoa

My mum’s prawn curry has to be one of my all-time favourite dishes that I look forward to every month! We tend to limit the amount of prawns we eat because of the high level of LDL cholesterol in prawns but once or twice a month we can’t go wrong!

I looooove the delicious sauce my mother makes, it is absolutely divine, and back when I was eating chappati, I could have 1 or 2 easily by dipping then piece by piece into the sauce and devouring, without even having touched the prawns! Mum usually adds potatoes but I felt that wasn’t enough for what I wanted to achieve.

I believe in serving you up the tastiest, healthiest, most nutrient-rich and of course spicy, food as possible to help you continue to make fitness gains without compromising on taste! Who said Indian food was unhealthy?! As you may already know, I am off the chappati and my mission is to create spicy, tasty, healthy, complex-carb rich food without the need for refined carbs, which block my plumbing and, well, I really am not going back to that painful place! Therefore, protein-rich pillau quinoa, with the method we use to cook pillau rice, is the way forward for me and for you if you want!

Now my mother uses fresh unpeeled and uncooked king prawns which I love because their shell adds to the gorgeous sauce, however, being someone who doesn’t like to get his hands dirty whilst eating (call me lazy and particular if you wish!), I decided to go for the easier option of shelled and cooked prawns!


The delicious vegetables!


INGREDIENTS

Spicy Green Prawns

1 onion

1 red onion

3 spring onions

4 cloves of garlic (I love garlic in my food!)

1 cm of ginger

1 cm haldi (not tamarind as I say in the video, my apologies!)

1 red chilli

1 green chilli

1 long red pepper

1 long green pepper

1 medium cauliflower

2 heads broccoli

1 carrot

150g cooked king prawns/300g fresh king prawns

Olive oil

Salt

Pepper

1 tablespoon dried coriander

1 litre of filtered and boiled water

1 tin of chopped tomatoes

200ml of filtered water, boiled


INGREDIENTS

Pillau Quinoa

100g quinoa

1 onion

4 cardamom seeds

8 cloves

8 black pepper seeds

200ml of filtered water, boiled.

Salt

Olive oil


INSTRUCTIONS

Spicy Green Prawns

  1. In a saucepan on ¾ heat, add 3 tablespoons of olive oil (put the water on to boil for the quinoa);
  2. Slice and dice the onions (hold back the green leaves of the spring onions until the end), garlic (I cut the garlic knobs up, press them in a garlic crusher and add them directly into the saucepan) and ginger and add to the saucepan to sauté. Stir regularly until the mix starts to bronze;
  3. To the onions, add in the tin of chopped tomatoes, dried coriander, tamarind and a half a teaspoon of salt and chop in the chillies (if you want your dish less spicy, add the chillies in with the other vegetables in point 7);
  4. Allow to simmer and continue to stir gently until the water evaporates;
  5. Slice the carrots, and cut the broccoli and cauliflower into manageable chunks;
  6. Add the boiling water to the saucepan and then add in the carrots, broccoli and cauliflower (and stir gently for a couple of minutes);
  7. Turn the heat down to a quarter, taste the soup and add salt and pepper to taste;
  8. Cover with the lid and leave the mix to cook for about 10 minutes;
  9. Add the prawns and chopped spring onion leaves and cover for 5 minutes;
  10. Feel free to add any coriander to finish and you are ready to eat!


Pillau Quinoa

  1. Begin making your quinoa preparations at point 6 of cooking the spicy green prawns;
  2. In a saucepan on ¾ heat, add 1 tablespoon of olive oil (put the water on to boil);
  3. Slice and dice in the onion and stir, sauté until the onions caramelise;
  4. Add in the spice mix of cardamom, black pepper, cloves and cinnamon sticks;
  5. Add in the boiling water and a ½ teaspoon of salt;
  6. Add the quinoa and stir gently. I gently rinse the quinoa first in lukewarm water and then drain it before adding it to the saucepan;
  7. Allow the quinoa to simmer, turn the heat down to a quarter, and cover with the lid;
  8. Check on it 3 to 5 minutes later and gently turn the quinoa over with a plastic or wooden spoon to ensure you keep your quinoa seeds in tact;
  9. Repeat step 8 until the quinoa is cooked and all the water evaporates;
  10. You are now ready to eat!


Spicy Green Prawn Curry With Quinoa


Preparation time: 15 minutes

Cooking time: 30 minutes

Eating time: 15 minutes

Serves up to 4 people

I made enough curry to last us another day and my mother and I like to eat our quinoa fresh!

Let me know how you get on and please feel free to provide feedback 🙂

Breakfast, Snack, Teatime

Spicy Masala Chai

Spicy Masala Chai

If you go to an Indian (or any Asian subcontinent) household you won’t simply be offered tea, but a choice of “English or Indian/Desi tea”!

What is the difference you may ask? Well, English tea is what we are accustomed to here in the UK: boil water, add to the kettle/mug with teabag, add milk, sweeten to taste, and voila!

Indian tea on the other hand requires a bit more than just hot water! First of all we use spices to help create that familiar scentsational aroma and up the antioxidants…. and then, depending how milky you like it, you can have 100% milk, 50-50 milk and water or 100% water and add some milk at the end. As you may know, I am lactose intolerant so use alternative non-dairy milk, and use sweetener from the stevia plant instead of sugar because it’s healthier!

You can purchase a quick and cheap version of this on the high street in coffee chains. On of them calls their version of it “Chai Tea Latte”, Chai means tea and latte is Italian for milk, so they are advertising “Tea Tea Milk”! Urgh! One of my pedantic gripes!

Here is how we make Indian tea in our home which serves 2 people.

All Chai Spices
All Chai Spices


INGREDIENTS

3 mugs of soya milk/almond/hazelnut/coconut milk

Stevia according to desired sweetness

4 small cinnamon sticks

4 cardamom seeds

8 whole black pepper

8 clove seeds

Small shaving of nutmeg seed

2 tea bags/4 spoons of loose tea (tea bags are easier to clean up!)


INSTRUCTIONS

Simmering the Chai
Simmering the Chai

1) On 3/4 heat, add all ingredients into a saucepan.

2) Stir until your tea to ensure good mixing – the darker your the, the stronger it will be!

3) Let the tea cook for about 5 mins.

4) Bring your tea to the boil a couple of times by increasing and then decreasing the heat, all the time ensuring you continue to stir – make sure you don’t let your tea overflow!

5) Breakfast or teatime, your Spicy Masala Chai is served!

Spicy Masala Chai
Spicy Masala Chai

Let me know how you get on and please feel free to provide feedback 🙂

Uncategorised

Welcome to Spiced Up By Bilal!

Hi! My name is Bilal Bham and I would like to welcome you to my blog, Spiced Up By Bilal!

I decided to create this blog because:

  1. I have some big health challenges which are lactose intolerance which means I can’t digest any dairy products like milk, cheese or yoghurt; and I have issues digesting refined carbs like bread, chapatti, rice and pasta. So I need to make food without dairy and refined carbs – no pizza for me! I also suffer from acid reflux and IBS (irritable bowel syndrome).
  2. I have some big fitness goals and lead a healthy and active lifestyle by going to the gym 5 times a week and dancing salsa in the evenings – so I need food that will provide me with a lot of energy and also help me keep making gains in the gym!
  3. I have some big taste needs! Much of the healthy food I see out there is pretty bland and boring and coming from an Indian background, I need a daily dose of tasty and mildly spicy food!

I know there are many people out there like me who have similar health challenges and lifestyle needs but still want to enjoy healthy tasty and spicy food!

So, I hope you enjoy what I will be serving up to you via Spiced Up By Bilal!