Browse Tag by Pescatarian
Dinner, Fish, Lunch

Spiced Up Salmon

Spiced Up Salmon is served!

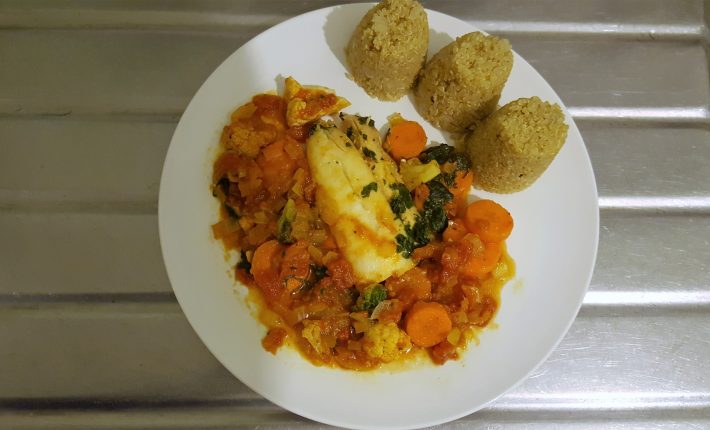
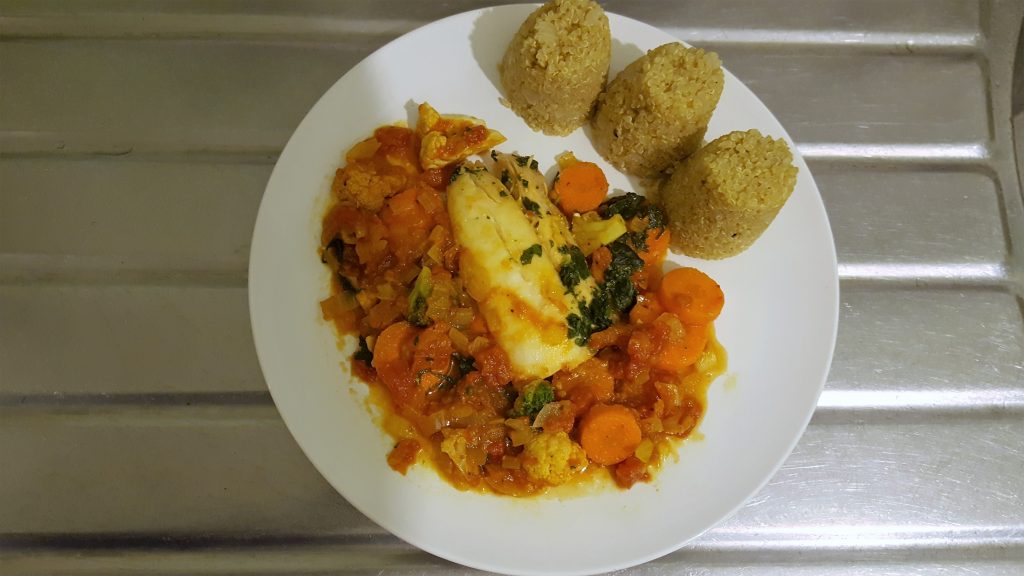
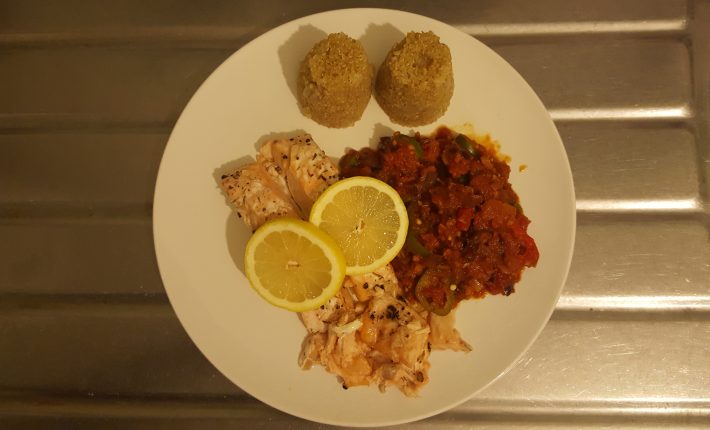
Continuing the theme of more fish in November, and going vegetarian for December, I had a craving for grilled salmon! Now normally, mum or myself will cook it by topping the salmon with garlic, ginger, chilli and seasoning and eating with some salad, but I wanted some taste and a little of a kick to my food, so I came with this! And even mum enjoyed the sauce, even if she’s not a big fan of salmon!

Salmon is a big part of my diet for my breakfasts and occasional lunches, where I eat the smoked variety on top scrambled eggs and avocado or with a mouth-watering salad!

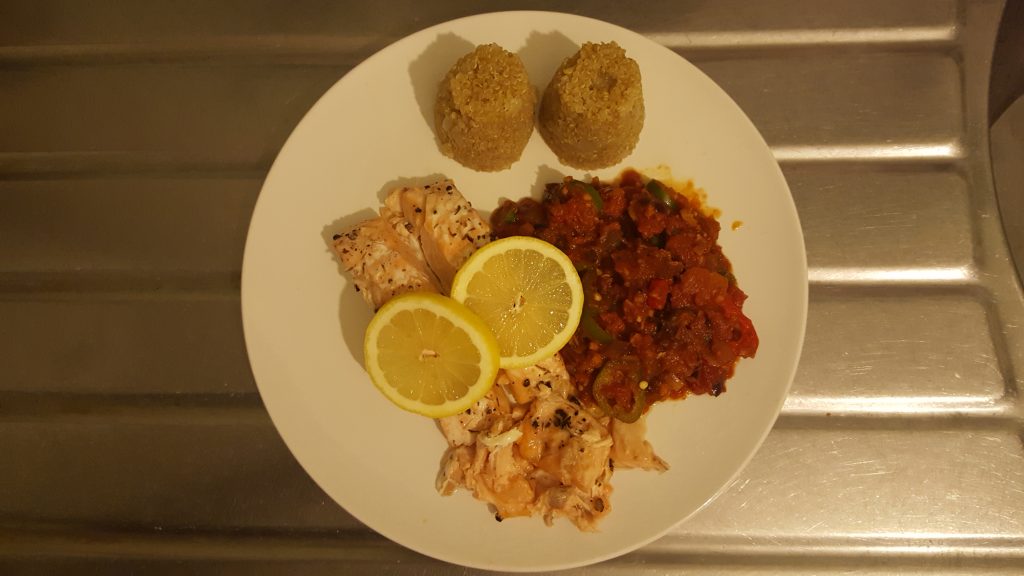
Instead of normal onions, I went with a red onion this time, because the scent of salmon is lovely but for me the red onion breaks up the taste and adds a layer of pungency to the dish! I added the green chilli and pepper for both taste and colour, otherwise it would be a very red dish! And as usual, I had it with some quinoa! I made sure that had a good mix of protein, fats and healthy carbs in this dish, and this one has the macronutrients covered!

You can have this dish with rice, naan, chapatti, bread, bulger, buckwheat or anything like that but I love my quinoa so had it with that!
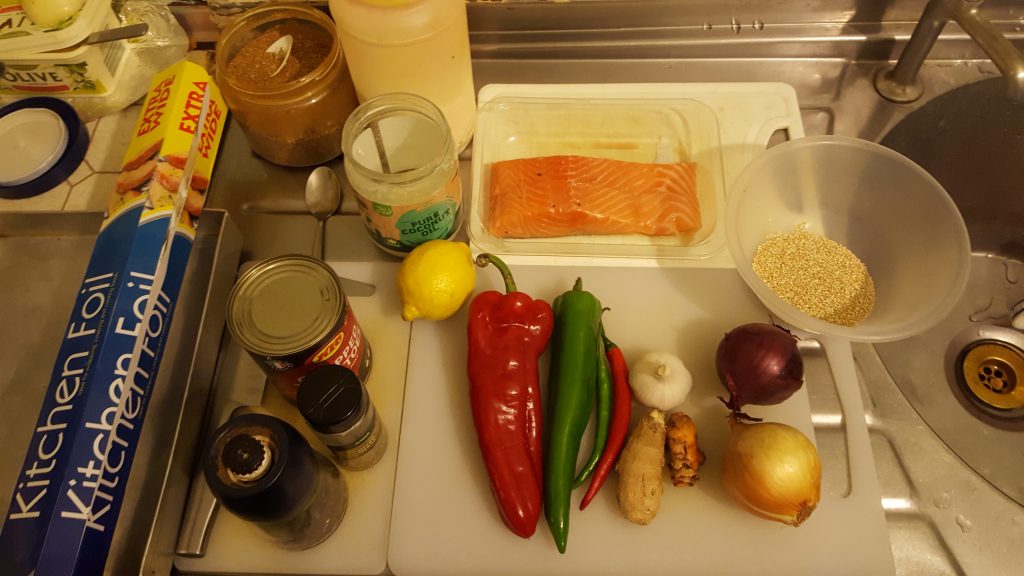
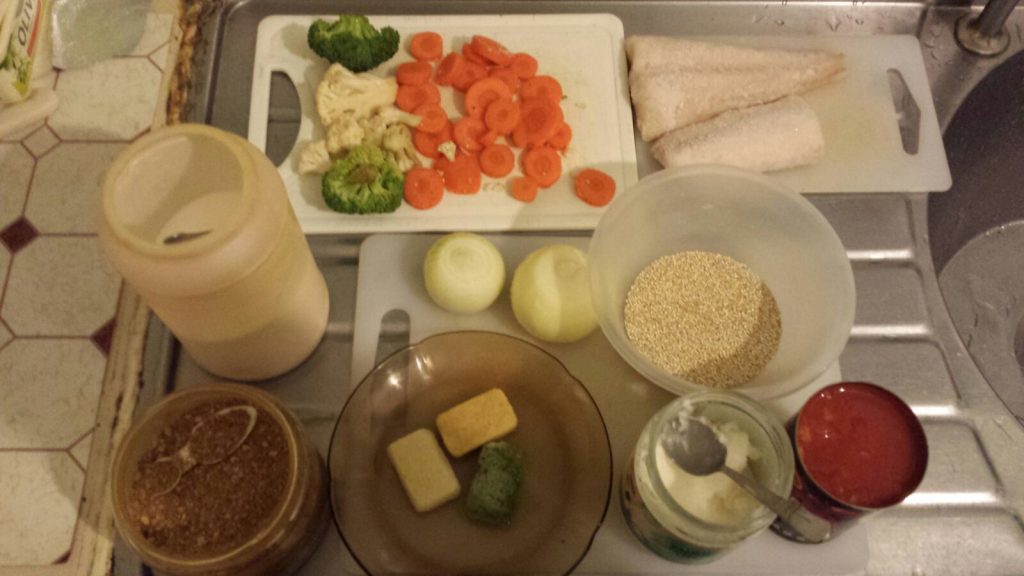
Spiced Up Salmon Ingredients!

INGREDIENTS

Spiced Up Salmon

2 salmon filet

1 fresh lemon

Pinch of salt

Pinch of pepper

Mixed herbs

Spiced Up Sauce

1 red onion

3 cloves garlic

1 cm ginger

1 cm turmeric

½ red chilli

½ green chilli

½ red pepper

½ green pepper

½ teaspoon dried coriander

½ tin of chopped tomatoes

Salt and pepper to taste

2 teaspoons coconut oil

Quinoa

40 g quinoa

½ small onion

½ teaspoon salt

1 teaspoon coconut oil

200 mL filtered water

RECIPE

Spiced Up Salmon

  1. Lay the salmon filets onto aluminium foil;
  2. Season with salt, pepper and mixed herbs (as I said in the vlog, you can do what I used to do, which is top the salmon with garlic, ginger, chilli and seasoning and have it with salad but I wanted something tastier!);
  3. Wrap the aluminium foil around the fish, closing all ends and leaving space for it took, it should look like a boat tent;
  4. Place on the middle shelf of your oven at gas mark 5/375F/190°C for 30 minutes;
  5. Bring out, unwrap the aluminium foil, place on your dish and top with slices of lemon, and your almost there!

Spiced Up Sauce

  1. In a large saucepan, melt 2 teaspoons coconut oil, and add in ½ sliced and diced red onion, crushed garlic, chopped ginger, and chopped turmeric, and cook and stir until the smell goes, cooking on 3/4 heat;
  2. Add in ½ tin chopped tomatoes, dried coriander, ½ teaspoon salt, and cook until the water evaporates;
  3. Add in the chopped chillies and peppers and cook until you have a tight sauce with all the water evaporated, around 10 minutes on ½ heat;
  4. Continue to stir occasionally and check the vegetables are done as you like them;
  5. Spiced Up Sauce is served! (If you wish, garnish with fresh coriander, parsley, basil or even mint!).

Quinoa

  1. In a saucepan on ¾ heat, add 1 teaspoon of coconut oil (put the filtered water on to boil);
  2. Slice and dice in the ¼ onion and stir, sauté until the onion caramelises;
  3. Add the quinoa and stir gently for 30 seconds, and then add in the boiling water and a ¼ teaspoon of salt, and allow the quinoa to simmer by turning the heat down to a quarter and covering with the lid;
  4. Check on it 3 to 5 minutes later and gently turn the quinoa over with a plastic or wooden spoon to ensure you keep your quinoa seeds intact. Repeat until the quinoa is cooked and all the water has evaporated;
  5. Cooking time is about 20 minutes and your quinoa is ready to eat!
Spiced Up Salmon is served!

Preparation time: 15 minutes

Cooking/baking time: 30 minutes

Eating time: 15 minutes

Serves 1 person – mum loved the extra sauce I made her but didn’t fancy the salmon!

Let me know how you get on and please feel free to provide feedback 🙂

Dinner, Fish, Lunch, Vegetarian

Hearty Haddock

Heart Haddock is served!

As part of me going chicken-free in November, and vegetarian for December, I decided to cook fish! I looked in the freezer and found some haddock. I love how my mum cook’s haddock but it can be a bit too spicy for me, and although I love chapatti, my stomach doesn’t do well with gluten! I also bought a pack of mixed vegetables the other day and I decided to put it to good use!

I love colour in my food, and although many of the dishes turn out red because of the tomatoes, I love the mix of green and red, so always try to ensure a colourful and of course tasty dish! Ever since I began this blog, I wanted to ensure that I had a good mix of protein, fats and healthy carbs in my dishes, and this one has the macronutrients covered!

You can have this dish with rice, naan, chapatti, bread, bulgur wheat, buckwheat or anything like that but I love my quinoa so had it with that! Also, depending on how well you like your vegetables cooked, adjust the time you cook them for. I personally like them slightly crunchy, mum loves them basically mashed! Each to their own!

Heart Haddock and Quinoa Ingredients

INGREDIENTS

Hearty Haddock

250 haddock filet (2 pieces)

1 large onion

4 cloves garlic (I used a bag we’d frozen before)

2 cm ginger (I used a bag we’d frozen before)

2 green chillies (I used a bag we’d frozen before)

Salt and pepper to taste

Optional: Red chilli powder

Small pack of mixed vegetables

½ teaspoon dried coriander

Optional: A handful of fresh or frozen coriander

2 teaspoons coconut oil

Quinoa

100 g quinoa

1 small onion

½ teaspoon salt

1 teaspoon coconut oil

200 mL filtered water

RECIPE

Hearty Haddock

  1. In a large saucepan, add in 2 teaspoons coconut oil, 1 chopped onion, and caramelise on 3/4 heat;
  2. Add in garlic, ginger, chilli, and cook and stir until the smell goes;
  3. Add in 1 tin chopped tomatoes, dried coriander, 1 teaspoon salt, and cook until the water evaporates;
  4. Add in the fish, mix, cover, and cook until all the frozen bits are cooked (unless using fresh, in which case cook until it is almost done), around 10 minutes;
  5. Add in the mixed vegetables and cover for 10 minutes;
  6. Continue to stir occasionally;
  7. Check the fish and vegetables are done as you like them and add the fresh or frozen coriander as a tasty garnish;
  8. Hearty Haddock is served!

Quinoa

  1. In a saucepan on ¾ heat, add 1 teaspoon of coconut oil (put the water on to boil);
  2. Slice and dice in the ¼ onion and stir, sauté until the onion caramelises;
  3. Add the quinoa and stir gently for 30 seconds;
  4. Add in the boiling water and a ¼ teaspoon of salt;
  5. Allow the quinoa to simmer, turn the heat down to a quarter, and cover with the lid;
  6. Check on it 3 to 5 minutes later and gently turn the quinoa over with a plastic or wooden spoon to ensure you keep your quinoa seeds in tact;
  7. Repeat step 8 until the quinoa is cooked and all the water evaporates;
  8. You are now ready to eat!
Heart Haddock is served!

Preparation time: 10 minutes

Cooking time: 20 minutes

Eating time: 15 minutes

Serves up to 2 people

Let me know how you get on and please feel free to provide feedback 🙂

Breakfast, Dinner, Lunch, Snack, Vegetarian

Fishy Omelette

Fishy Omelette :)

I love eggs! Free-range mind. And I eat 4 every morning for breakfast! I get my daily dose of post-gym protein and healthy fats without fail! Hard boiled, scrambled or as an omelette, I eat eggs! The omelette is ubiquitous throughout the world and comes in many different forms such as the frittata (Italian omelette) in Italy, tortilla in Spain (Spanish omelette) or the tamagoyaki in Japan (Japanese omelette).

In Gujarat, India, the birthplace of my parents, the omelette is called a pura. As you can expect, Indian omelettes are spiced up to the high heavens! If there’s no chilli, it isn’t Indian! I loved the omelettes my mum and dad made for me and sometimes mum does still make them. In our household, and I am sure many households, it is the default go-to dish when you are hungry, don’t want to make a fuss in the kitchen and enjoy a filling meal.

Now, I do love my mum’s omelettes, but they tend to leave me feeling a little hungry – must be my big appetite! So, about 3 months ago, after a big morning workout, when I felt hungry enough to eat a cow, I decided to experiment (much to the chagrin of my mother’s traditionalist attitude in the kitchen) with a tin of tuna, and half a tin of mixed vegetables, along with the regular spice, and coconut oil! Up until this point, mum was using olive oil (and vegetable or sunflower oils before that, which play havoc with my immune system) for her omelettes, even though we’d switched to coconut oil – something about frying and “proper” oil ;). Anyway, I ended up cooking a deliciously healthy, tasty, quick and easy meal, rich in protein, good fats and healthy carbs, which was rustled up in 15 mins, and eaten in about 5! You can have this omelette for breakfast, lunch and dinner, and if you reduce the ingredients, a hearty snack! Oh, and if you want to up your greens, this omelette goes perfectly with salad!

I cooked this without the half tin of mixed vegetables because it was late and I wasn’t as hungry as I am after the gym! However, don’t be scared to experiment, have a bit of fun in the kitchen and see what you can come up with!

Fishy Omelette Ingredients

INGREDIENTS

4 free range eggs

4 cloves garlic (I used a bag we’d frozen before)

2 cm ginger (I used a bag we’d frozen before)

2 green chillies (I used a bag we’d frozen before)

Salt and pepper to taste

Optional: Red chilli powder


Optional: ½ can of mixed vegetables

1 can of tuna (remove the brine)

½ teaspoon dried corriander

1 teaspoon coconut oil

RECIPE

  1. In a bowl, whisk up the eggs, garlic, ginger, chilli, salt, pepper, seasoning and tuna (and mixed vegetables);
  2. Heat up a teaspoon of coconut oil in a large non-stick frying pan;
  3. Pour the mix into the frying pan and cook on a medium heat for about 5 minutes, the bottom is cooked;
  4. Turn on the solar grill to full and place the frying pan in there for about 5 minutes whilst the top of the omelette cooks. If you don’t have a solar grill and/or want to flip the omelette, good luck!
  5. Once it cooks to your taste, place a large plate over the frying pan, carefully flip over, and you are ready to eat!
Fishy Omelette :)
Fishy Omelette 🙂

Preparation time: 5 minutes

Cooking time: 10 minutes

Eating time: 15 minutes

Serves up to 2 people

This was a meal for me, but it could easily feed 2! My rule of thumb is 2 eggs per person 🙂

Let me know how you get on and please feel free to provide feedback 🙂